How to paint a boat bottom – challenging?
COMMON PROBLEMS
Boat Painting – It’s a messy, time consuming job which can easily can go wrong if the paint products are applied incorrectly or if the wrong products are used. Some of the most common problems which come up are listed below:
Poor Quality Gel Coats Painted Badly

Owners of boats with gel coats will notice after a few years the surface may well begin to oxidise and chalk. You can wax and polish your boat, but a few months later it will probably turn dull again. This is when people turn to painting. If the boat is painted well the results will be good and depending on the weather may last for many years.
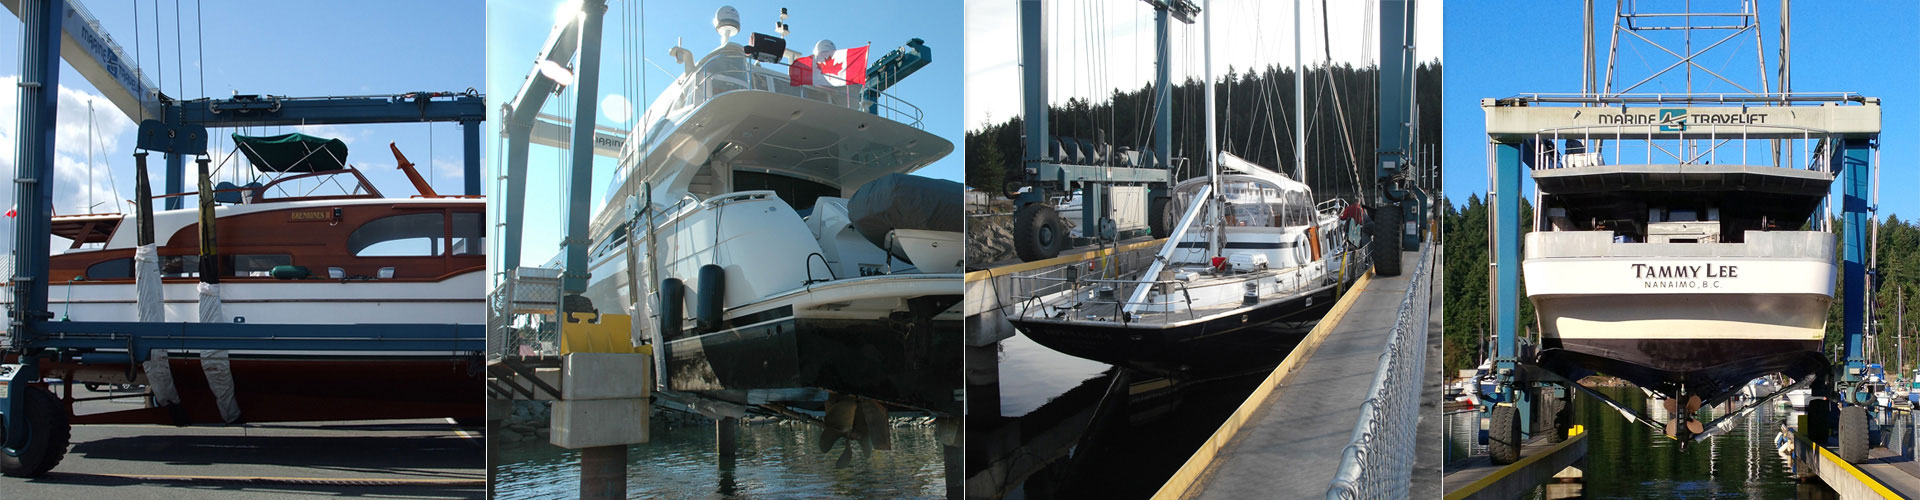
If you’re tempted to do it yourself or use casual labour, think again. Use a yard where their reputation is sacrosanct and you will be able to see examples of their work. A covered paint shed is essential for achieving a good result.
Dark colors have become popular, but be wary. Dark colors absorb much more heat than light colors so for dark painted areas it means the plastic will continue to cure. This can result in shrinkage and serious damage to to the surface.
Like all types of painting, preparation is key:
- Remove as much of the boat hardware as possible – window frames, cleats etc. Paint between the boat and the hardware will eventually crack and peel away.Avoid painting window frames and any stainless steel screws as eventually the paint will simply flake off.
- Remove all teak. Wood holds moisture so if you paint it eventually the paint will simply peel off.
- Remove all historical waxes that may have been absorbed by a porous gel coat. This is normally done by dewaxing and sanding.
- Fill all holes and scratches.
- Apply special primer coats to make the surface easier to adhere to.
At Nanaimo Boatyard this is a common problem people seek for us to resolve.
Blistered Paint
This is the familiar bubbles you see on paintwork and is caused by:
- The paint being put on too thickly or in hot or windy conditions where the paint has dryed too quickly.
- Air being trapped in porous areas such as when painting on wood or old antifouling paint.
- The surface being contaminated with salt.
- Filler being applied with air bubbles remaining.
- Paint being applied early in the morning or late at night when there is moisture in the air.
- Possible indication of osmosis.
It’s worth getting some expert advice before you go ahead with any work. Normally the blisters will need to be sanded back and then all the paint layers will need to be replaced. To create the finish you desire sometimes the best thing to do is re-paint the whole area.
Finish Area is Showing Brushmarks
The most common cause of brushmarks is having too much paint on the brush. Other causes are :
- Paint has been put on when the weather is too hot so the paint starts drying too quickly.
- Paint has been applied and then the person has gone over the same area again. It results in the paint starting to dry whilst the brush is still going over the paint.
- The undercoat has not been properly sanded leaving brush marks which are even more visible when another layer of paint is applied.
- The paint has gone past its’ use by date which means the paint will become denser and more likely to show brush marks.
Unfortunately, the only way to resolve brushmarks is to sand the area down and re-paint.
Paint Finish Appears Bumpy
This often occurs when people paint outside of a dedicated paint shed. Typical mistakes are:
- Brushes and rollers are not washed properly which means dust etc. are left on the brush which then end up on the surface being painted.
- Not properly cleaning the area after the boat has been sanded down.
- Putting the paint into other containers which have not been properly cleaned.
- Using dusty/dirty rags to wipe down paintwork.
- Painting in an area where the floor is dusty and insects can easily come into the area.
Paint is Peeling Off
Paint may come off in large or small pieces. The most common reasons for peeling paint are:
- The surface you are applying the paint to has oil or grease present which the paint cannot adhere to.
- Rust or some other form of corrosion is present on the surface.
- Additional coats of paint have been applied too quickly after the first not giving the first coat time to completely dry.
- The paint has been applied too thickly.
- Painting over too many old coats of paint which causes a thick layer of paint which peels away.
- Paint applied over antifoul which has been left exposed to sunlight for too long.
Paint Appears Matt (rather than gloss).
It’s a good idea to check for this as you paint so you can correct it as you go. It is caused by:
- Epoxy Resins – if they are cured in cool or humid conditions may have a reaction with the air which may cause film on the surface.
- Top Coats – avoid painting when the air is damp. The moisture in the air sits on the paint and results in matt looking paint.
Bearing in mind how hard marine paint needs to perform against the weather, the sea and being frequently knocked it isn’t surprising that painting a boat takes a lot of preparation and for the best result should be done in a dedicated painting area.
APPLYING BOTTOM PAINT
These are the stages for cleaning a boat:
- Clean your hull as soon as it comes out of the water. Seaweed and general dirt are far easier to remove when it is wet. Let it dry and you will have to chip it off piece by piece. Most boatyards will pressure wash the bottom as soon as they haul the boat out and many will take a long handled scraper to scrape back any bits that don’t come off with the pressure wash.
- Strip the bottom? It’s common sense that new paint put onto paint that is lifting won’t stick. Anywhere there is old paint that is lifting needs to be stripped. You may also need to strip the paint if you are changing the type of paint. For example, if you are using vinyl paint then the initial paint it is going onto also needs to be vinyl otherwise it won’t stick. The most ecofriendly method is a simple scraping tool, but if you use a chemical stripper double check it meant for use with fiberglass otherwise you may find you have attacked the gelcoat.
- Sand only? If the old paint is in good condition, then hopefully you just need to sand it, wash it, mark the waterline, and apply the new paint. Use 100 grit sandpaper and don’t be tempted to use a belt sander as they are designed to make things flat, not ideal for a gently curved hull. If you’re going to do this work in a boatyard, then you’ll need a shop-vac and random-orbit sander with a vacuum hose connection to capture most of the toxic dust generated. Make sure you wear a well fitted respirator and not just a simple paper mask. Even if you aren’t completely stripping the bottom, it is still a good idea to sand away most of the previous application to avoid a build-up of paint.
- Bare fiberglass. A brand new hull that has not been painted has mould release wax on the fiberglass that needs to be removed before you paint. Clean the hull with dewaxing solvent before you sand otherwise the wax goes into the scratches and it will be harder to remove.
- Don’t forget to mix your paint. It’s not just about mixing the paint colour it is making sure the copper element is through all of the paint, as it’s the copper that protects your boat. If the boatyard has a paint shaker, run it for at least 5 minutes to get the copper and pigment evenly distributed. If you haven’t got access to this then pour half the paint in another pot so you can mix it without sloshing the paint over the floor.
- How to roll the paint. Roll the paint using the a short-nap roller cover. Use a handle extension to make the keel easier to paint and however hot it is wear sleeves and gloves to keep the paint off your skin. Don’t add any thinner to the bottom paint unless the manufacturer recommends otherwise. Roll the paint up and down on the hull (i.e from waterline from keel). Work fast and stir the paint in the can to keep the copper distributed throughout.
- Prop and shaft. You can paint the prop, but copper-based paint won’t stick on a bronze prop or anything else for long. A heavy coat of wax on the prop will keep it clean for a time. Don’t paint the shaft and leave all anodes unpainted.
Despite modern technology painting the bottom of a boat is a labour intensive exercise requiring some learned skills. At Nanaimo Boatyard we’re happy to give advice or to take on the job.
Come and talk to us about your painting requirements.
Related